KickAssYoga

Montag, 30. März 2015

My first Yoga Retreat in September is up! YAY!


I am super excited to announce my first own Yoga Retreat called Yoga Meets Cross Training from 26.09.-03.10.2015 in sunny Croatia, close to Zadar. There will probably be some sun left from summer, the sea might be still warm as well and you can enjoy 1 week of 12 Yoga classes/ Cross Training and a Spa Treatment. 

I am so looking forward to enjoying the last days of summer by the beautiful Adriatic ocean. 


What's a Yoga Retreat?


  • It's a holiday including several Yoga Classes/Workshops a day

What is Cross Training?

  • a mix of all kinds of bodyweight exercises: Tabatas, HiiT Workouts...

Schedule Morning Sessions: 8:30 - 09:30

  • Start your day with a running session by yourself before
  • a Sunrise Yoga or Cross Training Session from 8:30 - 09:30

Afternoon Sessions: 60 -90 Minutes 

  • Foam Rolling + Myofascial Release Techniques
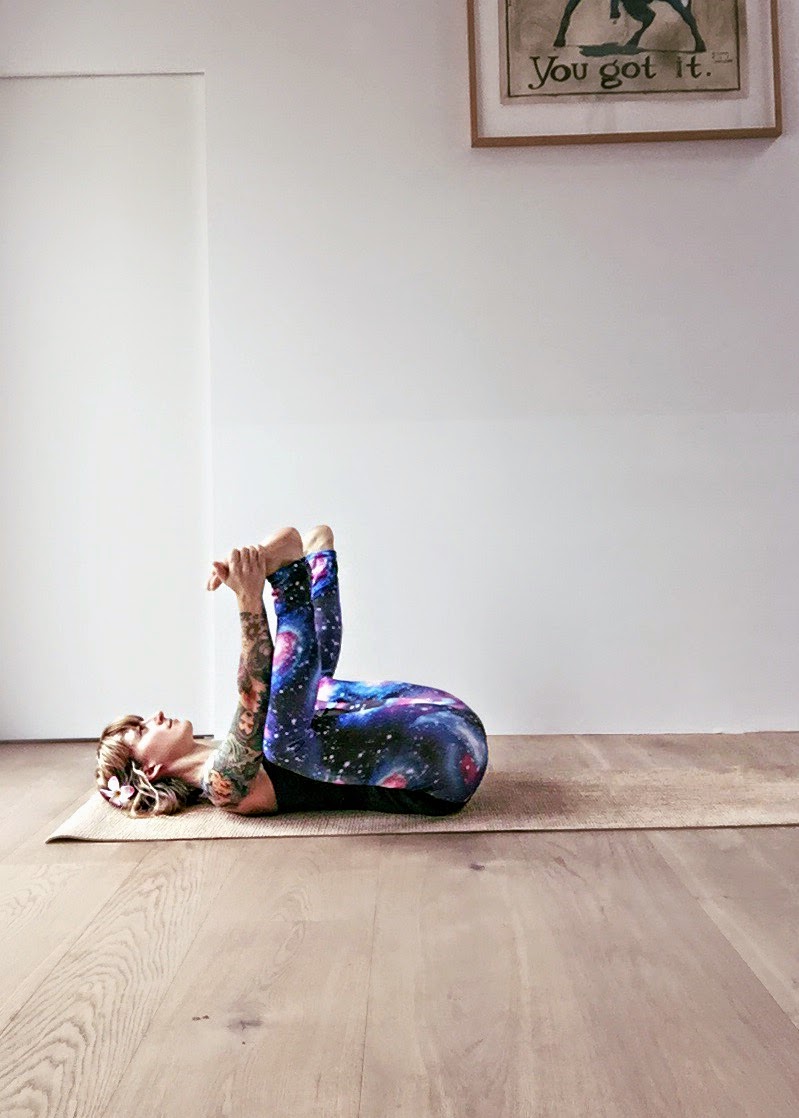
  • Embrace the Unknown: Vinyasa Flow + Inversions
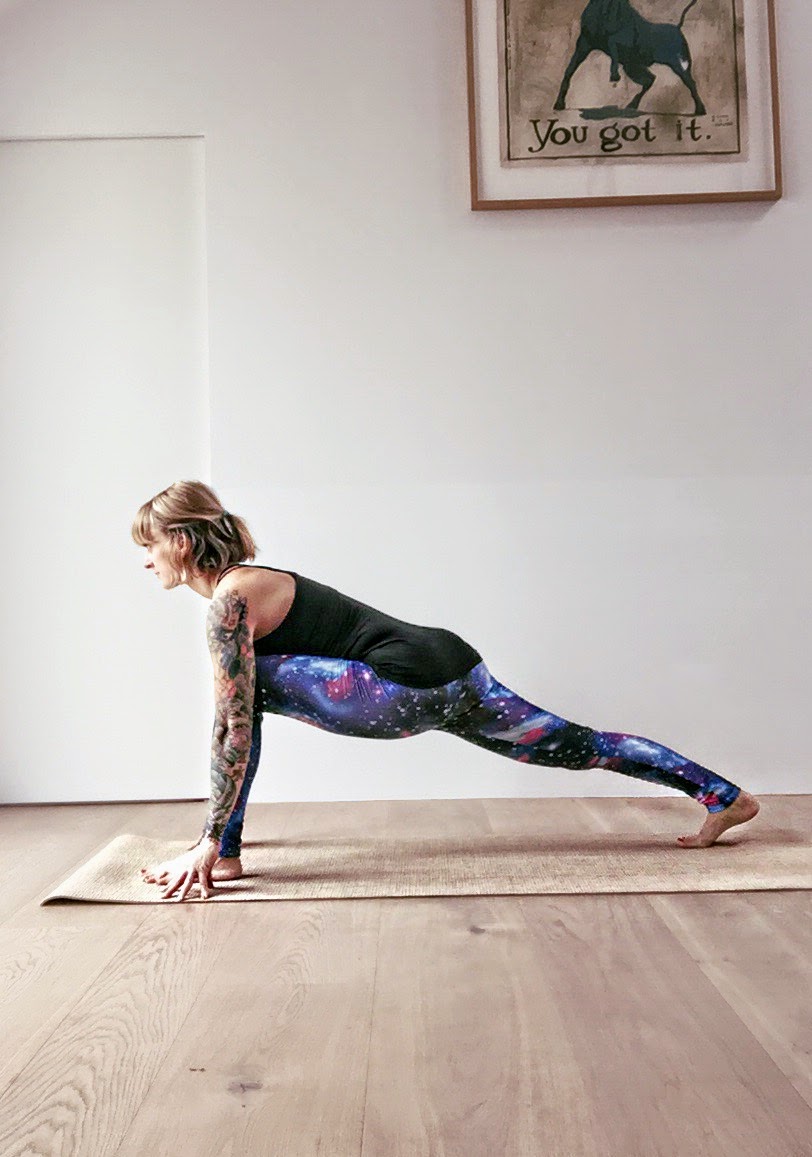
  • Reality Check: Vinyasa Flow + Balance Workshop
  • Fly like a bird: Vinyasa Flow + Core Work
  • Long, Slow, Deep: Hip Opener
  • Twist and Shout: Detox your spine

Costs:

  • from 1190,- € 

Language:

  • German and English - I speak Croatian and Slovenian as well, so there should be no language barriers.

Expectations:

  • Bring your own Yoga Mat
  • Book your own flights

You can book your stay (at the Hotel incl. 12 Training Sessions with me, a Massage and a Sailing Trip) here:

The Camp - Als Yogi beim Fitnessevent


HEALTH + LOOK GOOD NAKED + STRENGTH

Der Begründer von The Camp ist niemand anderes als Patrick Meinart, zusammen mit seiner Freundin Patricia. Patrick ist bekannt für seine - in der Fitness Szene sehr geschätzten - Programme Release Fitness und Gravity. Ich habe Patrick das Erste Mal vor ein Paar Jahren beim Foto Shoot für das Release Fitness Handbuch kennen gelernt.


In 2013 wurde das The Camp Event in's Leben gerufen und findet seit dem 2 Mal im Jahr statt. Dieses Event ist nicht nur was für Hobby Sportler, Crossfit Athleten und Lifter sondern eben auch für Trainer, die Lust haben sich fortzubilden, die Neusten Trends zu bestaunen oder zu bezweifeln und eben auch selbst auszuprobieren - und das alles in einem angenehm familiären Rahmen: Die Teilnehmer werden begrüsst, man fühlt sich gut aufgehoben und versorgt, es gibt ein gemeinsames Abendessen und evtl. wird sogar zu "Viva Colonia" geschunkelt (natürlich nur wer mag). An zwei Tagen laufen ab 9 Uhr Morgens parallel 4 Kurse, davon 1 ein Seminar zum Zuhören (und verdauen; sehr wichtig, gerade nach der Mittagspause). Auch wenn ich ursprünglich aus dem Ruhrpott komme, war ich vorher noch nie in Rösrath bzw. Bergisch Gladbach: Schön grün ist es da und ruhig. Genau das Richtige für mich als Großstadt Bummlerin.

Hier ein kurzer Überblick über die Kurse, an denen ich teilgenommen habe
(oder wie zB beim Strongman Workout :) nur zugeschaut habe:


FROMBall mit Art:
  • steht für FullRangeOfMotion 
  • effektives Medizinball Training für Rumpfstabilität und Explosivität          

Ermüdungserscheinungen mit Patrick:
  • Overreaching versus Overtraining: da scheiden sich die Geister. Ist alles nur Kopfsache? Gibt es Übertraining überhaupt? 
  • (Ich denke schon, aber das nur am Rande.)

Leistungsoptimierung durch Nahrungsergänzungen mit Holger:
  • Welche Supplements sind sinnvoll, wie oft und wie viel? Welche Supps sind totaler Quatsch? Holger hat sehr plausibel 'aufgeräumt'

Programming mit Andreas:
  • Klassisches Programming versus höhere Frequenzen im Aufbau eines gescheiten Trainingsplans

Spontanes Core Strength Seminar mit Andreas:
  • Ein Seminarmodul war ausgefallen und Andreas ist, auf vielfachen Wunsch, noch ein Mal spontan mit einem meiner Lieblingsthemen dran gekommen: Core Strength oder 'Wie man die Strasse zum Glück legt' alles unter den Hauptaspekten HEALTH, LOOK GOOD NAKED und STRENGTH
LET'S BANDS mit Niko:
  • Können kleine bunte Gummibänder eine Trainingseinheit vom Warm Up, bis zur Mobility über Plyometrics und PushUps helfen ein Training zu verfeinern und zu intensivieren? Yes, they can!

RKC Kettlebell (Bottoms Up) Press:
  • Kettlebell Training ist toll, weiss jeder, die beiden Trainer von RKC haben eine mir vorher noch unbekannte Art und Weise des Press gezeigt, nämlich
  • den Bottoms Up Press, ist knifflig und erfordert viel Konzentration und Griffkraft und verbessert das Thema Press allgemein
  • Hierbei wird die KB quasi 'falsch herum' gecleant, so dass die Kugel über dem Griff steht und dann hoch gedrückt

Strongman Workout mit Andreas:
  • An diesem Kurs haben bestimmt 30 - 40 Teilnehmer geschwitzt, geächzt, jemanden geschoben oder mit einem Hammer einen LKW Reifen bearbeitet
  • Schon beim Zuschauen hab' ich irgendwie mitgelitten und doch sahen alle, die mitgemacht haben zwar fertig aber auch ziemlich zufrieden mit sich aus
TRX Suspension Trainer:
  • Dieser Kurs war begrenzt auf ca. 15 Teilnehmer aufgrund der Geräteanzahl
  • Das sah das etwas kompliziert und fummelig aus, aber dennoch effektiv was die Rumpfspannung und allgemein ein Ganzkörpertraining angeht  

Ich hatte grossen Spass und muss das Gelernte abspeichern und anwenden und bedanke mich bei Patrick & Patricia für die liebevolle Organisation, meine Crew: Ben, Steffi, Anna, Flo, Markus und Micha, Art von FromBall, Andreas Pürzel von Intelligent Strength, Holger Gugg von der HBN, Niko von Lets Bands, RKC, Kraft des Urstromtals und allen andern, zu deren Kursen ich es leider nicht geschafft habe. Next time! Und wer weiss, vielleicht bin ich ja nächstes Mal mit einer Yoga Session dabei. ;)


Mehr erfahrt ihr hier:


Donnerstag, 26. März 2015

Interviewing LINDSEY STERLING for the format ARTIST COUCH

When I'm not practicing or teaching Yoga, writing about it or being a Mom, I work as presenter. I started about 13 years ago, working as a VJane on Viva tv. Somehow that Job stuck with me.

I just did an Interview with The Prodigy on monday. They were super sweet and even brought me a drink, which I never had tasted before. Unfortunately I forgot the name of it. There was definitely a pepper swimming in it! They even said that this drink got them through the recording of their new album...well. One was more than enough for me, because I usually don't drink.

So, on friday, which is already tomorrow, I will have the pleasure of talking to the charming, cute and talented Lindsey Sterling. She is often describe as the "HipHopping" Violinist, and I think we'll spend about 2 hours chatting, answering Q's live via Twitter and playing games. Send your Questions in using the Hashtag #asklindsey, either now or live during the show.

Tune in tomorrow, friday, at 7pm CET (that's Central European Time)! 

http://www.twitch.tv/artistcouch

HAPPY HIPS: Part 7 FIRELOG POSE

FIRE LOG POSE - AGNI STAMBHASANA 
also known as Double Pigeon can be modified to the need of each Yoga student. I am no friend of forcing people into poses, just because it needs to look like the "Original" from a book or Yoga Poster. That doesn't work, because you would be comparing a dancer with tremendous mobility to someone working hard whilst sitting at a desk. 

I encourage you to modify the pose so that you feel a comfortable stretch, and at the same time not harming your knees or lower back. This is a tough pose for me too. You can see that my knees are not resting on the floor (yet). The first photograph is showing the hardcore/advanced stacked leg position in FIRE LOG POSE and the second picture is the easier, modified version.


PROPS: 
  • optional: Blanket underneath hip 
  • optional: Block/Blanket underneath upper knee
BENEFITS:
  • stretches the inner groin and outer hips
CAUTIONS:
  • do not practice with pain, esp. in Groins or Hips, Lower Back or serious knee injuries                        
STEP BY STEP:

  • Sit on the edge of a folded blanket or on a block/books.
  • Place your left shin in front of you, shin parallel towards the front of the mat, so that you create a wider, more open SUKHASANA - CROSSED LEGGED SEAT.
  • Stack your right shin on top of your left shin. 
  • Flex your feet to support your knees.
  • To help release the hip, grip your right thigh at the hip crease and rotate it outward.
  • Keep your sitting bones grounded and slowly increase the stretch by leaning the upper body forward.
  • Breathe evenly and hold the pose for 1-10 minutes on each side.
  • Modification: 
  • For an easier version: don't stack your shins, just bring the right foot down in front of your left shin. 
  • Walk your feet toward the outer edges of the mat.
  • Keep your sitting bones grounded and slowly increase the stretch by leaning the upper body forward.
  • Breathe evenly and hold the pose for 1-10 minutes on each side.


Note on the side: Count your breaths, so that you can hold both sides for approx. equal amount of time. It is quite common that the left side, the other side is being held for a little shorter while. 

Mittwoch, 25. März 2015

Lieblinge der Woche: Herzteil & Yogatonic

Meine Lieblinge der Woche bestehen heute aus 2 für Yogaübende und Yogalehrende wichtigen Bestandteilen:

Einer Yoga Matte von HERZTEIL und einem Yogamatten Gurt von YOGATONIC, um das Ding (also die Matte, die gerne mal, wenn es keine Travel Variante ist, ein paar Kg wiegen kann) nicht die Ganze Zeit unter dem Arm herumschleppen zu müssen. 

Das Schöne gerade an diesen beiden Teilen ist, dass sie von Hand gefertigt/bzw. bemalt werden und von selbstständigen Frauen hergestellt werden, die ganz viel Liebe für's Detail und für Ästhetik haben. 

Die Matte: das HERZTEIL
gibt's in rosa, grün oder lila und ist aus einem Kunststoff/Leinen Gemisch, was folgende Vorteile hat: auf der Unterseite ist eine Kunststoff Schicht, die die Matte auf dem Boden rutschfest macht und auf der Oberseite ist eine Mischung aus Beidem so dass sie Griffest ist und es keinen unangenehmen Gummi Geruch gibt. (Falls doch, verfliegt der erfahrungsgemäss immer Recht schnell.) Ich mag die raue Oberfläche, die schöne grüne/türkise Farbe und liebe meinen mit ganz viel Geduld perfekt gesetzten individuellen Schriftzug. Das eigene Motto auf der Matte gibt's nur hier!

www.herzteil.de


Der Gurt: STRAP A PORTER
gibt's in 4 verschiedenen, dezenten Farben, ist aus festem, elastischen Material in cleanem Look, passt zu jeder Mattendicke und Grösse und passt sich dem Rücken der Trägerin an. 

www.yogatonic.de

Ich freu mich sehr, dass ihr mir über den Weg gelaufen seid!

Wer mehr erfahren möchte, besucht die beiden auf ihren Seiten.


J


Dienstag, 24. März 2015

HAPPY HIPS: Part 6 BADDHA KONASANA

RECLINED/ SEATED BUTTERFLY - (SUPTA) BADDHA KONASANA

Seated Bound Angle is definitely not a Beginner Pose. Many struggle with it, because sitting upright on the floor is something many people don't do on a regular basis without encountering any sort of back pain. And this is also the problem with Beginner Yoga Classes: these often start seated on the floor, which is contradictory because most people sit the whole day and then they're forced to sit in Yoga AGAIN. Anyway, props are always helpful to sit upright on something (a block, books, blanket...be inventive- use whatever suits you!) without collapsing in the lower back. 
Much easier and way more comfortable is the reclined version where you lie on your back and allow gravity to help you out. You could also use a strap to increase the stretch.


PROPS: 
  • Blanket or Block for SEATED BUTTERFLY
  • Cushions for RECLINED BUTTERFLY 

BENEFITS:
  • Stretches the inner thighs 
  • Stimulates the heart, abdominal organs, ovaries, bladder
  • Improves circulation
  • Supposedly massages internal organs and helps reduce menstrual symptoms
  • Can be practiced even when you've had a meal
CAUTIONS:
  • Do not practice with pain, esp. in Groins or Hips, or with serious knee injuries or lower back pain!


STEP BY STEP: BADDHA KONASANA
  • Sit on your mat (maybe on a block/blanket).
  • Either grab your big toes or open your feet up like a book.
  • Pull your feet in close to you. If this is too much, you can move them further away. 
  • Take a deep inhale, lengthen your spine, Exhale rotate your thighs outward, gently lowering knees further down towards the ground.
  • You can stay upright, if this feels better for your back.
  • Or lean forward, giving a little push through the elbows and maybe rest your head on your feet.
  • Stay for about 10 -20 breaths. Take a break, and repeat another 2 times.


Modification: SUPTA BADDHA KONASANA

  • If SEATED BUTTERFLY is too intense, try RECLINED BUTTERFLY
  • Lie on your back, fold your feet in, soles of the feet together
  • Allow your knees to drop to the sides.
  • If there is too much tension in your groins put 2 cushions, one on each side underneath your knees/thighs.
  • Rest for as long as you feel comfortable, maybe 2-5 Minutes.
  • Focus on deep exhales to let go of what feels tight.


Montag, 23. März 2015

Don't measure a woman's worth by her clothes.

TERRE DES FEMMES: Menschenrechte für die Frau

Seit dem 15. Jahrhundert galten hohe Absätze als Zeichen für Reichtum, zwischendurch, in der Französischen Revolution wurden sie wieder flacher, aus dem einfachen und lebensverlängernden Grund: um sich eben nicht als Wohlstand zu outen.

Heute gehören hohe Schuhe zum vermeintlich guten Ton der Damenwelt: Wer keine trägt, wirkt nicht erwachsen, wer zu hohe Absätze trägt, wirkt grob gesagt: nuttig. 

Never judge a book by its cover - Urteile nicht nach dem Äusseren. Und doch sind wir so schnell, wenn es darum geht jemanden zu beurteilen oder einzuschätzen anstatt uns an die eigene Nase zu fassen, oder an die eigenen Füsse.

Dennoch sind 'Die Füsse die Visitenkarte der Yogalehrerin'. Dieser Satz fiel in meiner Yogalehrerausbildung und hat mich seit dem begleitet. Zwar sind unsere Fußsohlen öfter mal schwarz, ein gepflegter Fuss, der den Schülern schon mal sehr nahe kommt, muss in diesem Beruf allerdings auf jeden Fall drin sein.

Eine schwedische Studentin hat gerade eine Kampagne mit einer deutlichen Bildsprache gestartet (und sich dabei das Logo von Terre des Femmes dabei geliehen), die mir - in meinem Job - sehr entgegen kommt. Die Bezeichnungen der imaginären Absatzhöhen auf dem Foto sind einzeln gesehen mal lustig, mal provokant, entsprechen aber in diesem Kontext leider dem Klischee, wie Frau allgemein wahrgenommen wird. Ich trage im Alltag keine hochhackigen Schuhe, weder Boots, noch Wedges und zwar aus folgenden Gründen:

  • Verletzungsgefahr: ich habe keine Lust umzuknicken und mir das Fussgelenk zu brechen oder beim Radeln mit dem Absatz zwischen dem Kopfsteinpflaster feststecken zu bleiben. Muss nicht passieren, warum soll ich allerdings freiwillig die Risikowahrscheinlichkeit erhöhen?
  • Mobilitätseinschränkungen der rückseitigen Kette: ich mag es im Downdog meine Fersen auf der Matte ruhen zu lassen. Das war nicht immer so. Wenn man sich etwas erarbeitet, liegt einem mehr daran und so habe ich diesen Herabschauenden Hund jetzt so lieb gewonnen, dass ich auf Verkürzungen der Achillessehne - nur um chic auszuschauen - ziemlich gut verzichten kann.
  • Fussschmerzen: Die letzten Paar Male in denen ich über Stunden in meinen neuen Boots mit 5cm Absatz stand, hatte ich nicht nur Blasen sondern auch wahnsinnige Schmerzen, weshalb ich fest daran glaube, dass Stiletto-Designer Füsse HASSEN müssen. Sonst könnten sie ihnen diese Pain nicht ungestraft antun. Wir ernten Schmerzen und krumme Zehen und zahlen auch noch dafür. Absurd.
Natürlich habe ich einen kleinen Schrank voll mit diesen Schuhen, die meine Kinder im Spiel mal 'benutzen' und dabei kichern: "Guck mal, ich bin eine Schicki-Dame" und ab und zu, zu besonderen Anlässen, ziehe ich diese dann auch an. Komme aber immer wieder darauf zurück, dass ich Sneaker, Chucks, Vans oder wie auch immer sie heissen VIEL VIEL bequemer finde und mich darin auch kein Stück prüde finde. Das Beste daran jedoch ist: dass es mir egal ist, wie andere das finden. Für mich ist die Hauptsache, dass ich meinen Kindern als Beispiel voran gehe und ihnen Gesundheit und Gleichberechtigung vorlebe. 


Freitag, 20. März 2015

HAPPY HIPS: Part 5 HALF PIGEON

HALF PIGEON - EKA PADA RAJAKAPOTASANA


One legged Crown Pigeon is your friend. I'm saying this because many people keep struggling with it, and sometimes you just HATE, HATE, HATE it. Plus in this kind of pose, any excuse to come out of it, is legit: either you 'need' a wee really badly or you're maybe even sometimes faking 'knee pain' just to avoid facing the unconfortableness (did I just invent this word?) of PIGEON POSE.


If you do happen to have any kind of knee pain - occasionally I do too - there are a couple of things you can try, like opening the front of the thighs before going into HALF PIGEON or try activating your front foot, as to protect the knee. Some people start fidgeting around, moving the knee closer toward mid line or tense in the shoulders...all this creates more tension instead of trying to release those sweet parts - like the outer part of your ass cheeks... If you start seeing HALF PIGEON as your friend, you can stop fighting it and start enjoying its benefits.


PROPS: 

  • Blanket underneath hip to avoid leaning to one side too much
  • maybe a cushion to rest your head on
BENEFITS:
  • stretches the inner groin and the lower spine
CAUTIONS:
  • do not practice with pain, esp. in Groins or Hips, or with serious knee injuries      
  • if knee pain occurs, switch to shoelace pose                   
STEP BY STEP:

  • From Downdog, Inhale lift your right leg up behind you, exhale place your right shin underneath your belly.
  • Walk your left foot back to lower your hips closer towards the ground.
  • Your right knee is on the right side of your mat, and your left foot on the left side - ideally your right shin would be parallel to the front edge of the mat.
  • This needs time, if it is currently not yet happening.
  • Padding your right buttocks to stop from tilting to one side might help staying centered with your hips.
  • If possible, lie on your forearms or on a cushion.
  • Stay for about 15 breaths on each side or set a timer and hold each side for about 1-3 Minutes.
  • Coming out of the pose: tuck left toes under, and push back into three legged down dog. 
  • Repeat on the other side.
Modification: SHOELACE POSE
  • Lie on your back.
  • Stack your right foot on top of your left thigh, flexing right foot.
  • Interlace your fingers behind your left thigh.
  • If your head and shoulders should start lifting off the ground, place a cushion underneath your head.
  • Or: put you left foot against a wall and move towards the wall so that you feel a nice opening in your right buttocks, without allowing your sacrum to lift.
  • Repeat on the other side.


Note on the side: Count your breaths, so that you can hold both sides for approx. equal amount of time. It is quite common that the left side, the other side is being held for a little shorter while. 


Donnerstag, 19. März 2015

HAPPY HIPS: Part 4 FROG POSE

FROG -  MANDUKASANA

In Part 4 of our YOGA BASICS series, we're looking at a MASSIVE inner thigh stretch, called FROG POSE. (There are various Yoga styles, with numerous names for different postures, so this might be called different then what you've learned or seen, but let's not argue about that...) This one gets the Adductors with almost aggressive intensity that becomes even more important to listen to your body: are you hurting your self or are you benefiting from this position? Start easy and increase slowly, rather than throwing yourself too fast, too deep into the pose. The key is to EASE into your hips.

PROPS: 
  • Blanket/ Padding for sensitive knees
  • Cushion to rest your upper body

BENEFITS:


  • Stretches the inner thighs 
  • Opens chest and shoulders
  • Supposedly therapeutic for menstrual cramps      (I do not have tried it yet for this occasion though)


CAUTIONS:

  • Do not practice with pain, esp. in Groins or Hips, or with serious knee injuries, ankle injuries or lower back pain!
STEP BY STEP:

  • Begin on all fours. Walk your knees out to the sides, hips in line with your knees, so that you feel a comfortable stretch without straining. 
  • If you need more cushioning under your knees, place one knee on your mat and the other one outside of the mat on a blanket.
  • Your shins should be parallel towards each other, feet are flexed.
  • If it feels good, lower your forearms down to the ground.
  • Tilt your tailbone down to avoid arching in your lower back.
  • Keep the back of your neck long. Close your eyes and breathe. 
  • Stay for as long as you can listen to your breath without screaming in agony on the inside.
  • IF you need to scream, do so! Or use lions breath to vent.
  • Over time your knees may slide further apart.
  • Coming out of the pose: Slide your upper body forward, knees together, either roll onto your back and gently pull your knees in toward chest or sit up, knees together. Rest.

Modification: EASY FROG

  • If FROG is too intense, try EASY FROG
  • Although I have heard students call this one harder, you may try and find out your self.
  • Same start: on all fours, knees out to sides, but:
  • big toes touch, lower your feet down to the floor and then try to reach your buttocks towards your heels.
  • Rest your upper body on the floor or on a cushion.
  • Stay for as long as you can listen to your breath, maybe 2-5 Minutes.


P.S. Now you know why the Sticky Mat Label "Manduka Mats" have a little frog as their logo. ;)

Mittwoch, 18. März 2015

HAPPY HIPS: Part 3 HAPPY BABY


HAPPY BABY POSE - ANANDA BALASANA
is a wonderful, calming pose to either end a high intensity Vinyasa Style class or begin a Yin Yoga session. This pose can be very challenging for those who have been sitting a lot, so using a strap will come in handy. Try rocking in this position to massage your muscles left and right of spine, called Erector Spinae on your Lower and Mid Back.

PROPS: 
  • optional Strap/ Belt

BENEFITS:

  • gently stretches the inner groin and the lower spine
  • calms the mind, helps relieve stress or fatigue

CAUTIONS:

  • do not practice with pain, esp. in Groins or Hips, or with serious knee injuries                         

STEP BY STEP:


  • Lie on your back. With an exhale, bend knees into chest.
  • Allow your knees to open up wider than your torso, so you can grab the outsides of your feet.
  • If you can not reach your feet, wrap a strap over both feet and grab the ends on the outsides of both feet.
  • Your shins are perpendicular towards the floor. Feet flexed.
  • Slowly try to lower your sacrum down towards the mat, and at the same time gently pulling your knees down towards your armpits.
  • If it feels good: try rolling left and right like a Happy Baby without Nappies. :)
Modifications: ARDHA ANANDA BALASANA
  • For a one-legged variation, just grab your right foot. Left foot stays flat on the ground or left leg extends. 
  • Avoid collapsing to the right side. 
  • Keep your left hip grounded.
  • Could your breaths. And change sides. 


Samstag, 14. März 2015

HAPPY HIPS: Part 2 HIGH LUNGE

In Part 2 of our YOGA BASICS series, we're looking at another really simple pose, which is HIGH LUNGE. HIGH LUNGE kind of is the advanced variation of LOW LUNGE and  it' s the ground floor, like Prep Work for some of the following poses: Crescent Lunge - also known as Warrior 1, Warrior 1 Twist and Vashistasana. These Follow Up poses involve lifting the torso upright, which leads to backhanding. So, no backbends in this one, groundwork first. We'll see from here. Lunges are great for decompensating the overall lifestyle of sitting on our asses all day. We need to strengthen our legs more and open our hips, which is why I personally love all LUNGES.


Let's look at our base, the HIGH LUNGE:

PROPS: 

  • optional Yogablocks/ or books underneath your  hands.

BENEFITS:
  • releases tension in hips
  • stretches hamstrings, quadriceps, psoas
  • strengthens your legs
  • helps build mental focus

CAUTIONS:
  • do not practice with pain, esp. in Groins or Hips, or with serious knee injuries
  • neck problems ( rather look down at your mat instead of straight ahead)                            

STEP BY STEP:
  • From Downdog, lift right leg up 
  • Exhale step your right foot forward between your hands, aligning the right knee over the heel. Do not allow your right knee to go past your foot, if it does, increase the length of your stance.
  • Come onto you fingertips or blocks and try to arch your back as if you're trying to create a hollow back, just to stop your back from rounding.
  • With every inhale reach your heart forward, lengthening your spine and with each exhale push your left heel back, creating space in your left groin.
  • For more intensity: place both hands on the inside of right foot. Either stay here and try to lower your forearms down (over time!, again: avoid rounding your back) or as shown on the 2nd pic: walk your hands away from your right knee, without allowing your knee to drop to the center, instead push your knee to the right and maybe walk your hands diagonal away from your knee or bring forearms down.
  • Coming out of the pose: walk hands back to center, step right leg back. Switch sides.


Note on the side: Count your breaths, so that you can hold both sides for approx. the equal amount of time. It is quite common that the left side, the other side, is being held for a little shorter while. Stay for about 15 breaths on each side or set a timer and hold each side for about 1-2 Minutes. 


Donnerstag, 12. März 2015

HAPPY HIPS: The LOW LUNGE


The LOW LUNGE - ANJANEYASANA

To start off with the YOGA BASICS Hip Opener series, we'll begin Part 1 with a really simple one, the Low Lunge


(Yes, there is a High Lunge, which I'm going to post as Part 2.) Lunges are part of our basic movement patterns, just a little over exaggerated. Every step you take, while walking, can be a Hip Opener if you activate your Glutes. Over time with certain variations the Low Lunge can get really intense. And as I have recently learned: through new scientific reasearch regarding the topic of stretching the FASCIA with Yoga, it's really good for your Neuro system to change the way you practice from now and then, so that your system can adapt and grow through new input/ new challenges. As I said before in the Intro to this series, I am showing you variations of Hip Openers that are EASY for your lower back. In classic ANJANEYASANA the torso is upright, the arms reach for the stars, possibly you sink deeper into the groin. This needs to be done with perfect care and good alignment for your lower spine. I am purposely leaving this out, for now. 


PROPS: 

  • optional padding/ blanket underneath the kneeling knee.
  • optional Yogablocks/ or books underneath your  hands.

BENEFITS:

  • releases tension in hips
  • stretches hamstrings, quadriceps, psoas
  • strengthens your knee
  • helps build mental focus

CAUTIONS:

  • do not practice with pain, esp. in Groins or Hips


STEP BY STEP:

  • From Downdog, lift right leg up into Eka Pada Adho Mukha Shvanasana (One Legged Downdog) 

  • Exhale step your right foot forward between your hands, aligning the right knee over the heel.

  • Lower your left knee to the ground (optional padding), keeping the right knee in place.
  • By pressing down the ball of my back foot, you can increase the length in your left groin. 

  • You can also drop the top of the left foot flat.
  • Palms or fingertips down, optional Hands on Blocks.
  • With each inhale imagine lengthening your spine forward, dropping your tailbone toward the floor, lifting your pubic bone up, towards your navel.

  • With each exhale sink into your Hips.
  • Inhale lift your left knee off the floor, Exhale step back into Downdog.
  • Repeat on the other side.

Note on the side: Count your breaths, so that you can hold both sides for approx. equal amount of time. It is quite common that the left side, the other side is being held for a little shorter while. Stay for about 15 breaths on each side or set a timer and hold each side for about 1-2 Minutes. 


Dienstag, 10. März 2015

YOGA BASICS: Happy Hips

7 Tricks for Happy Hips

I am introducing my new series called Kick Ass Yoga Basics and I will be starting off with the 7 most important Hip Openers. There are many more, but I handpicked these because they are Beginner friendly and still challenging for Pros as well, without crossing the line from Hip Opener to Back Bend for all of those who find Backbends very challenging.

Since I don't really believe in overall Levels like "I've been practicing for years, therefore I'm Level 4", I'd like to be clear that I do believe that each one of us owns different kinds of "Levels" of strength or mobility in their bodies.


These following 7 important Hip Openers are divided into easy, medium and tough versions so that you can pick your own Variation for each day.

When practicing Hip Openers it is really interesting to find out where the so called comfort zone ends and hard work begins without straining yourself. Practice without pain.

1. Low Lunge
2. Crescent Lunge      = ANJANIYASANA
3. Happy Baby Pose   = ANANDA BALASANA
4. Half Pigeon            = EKA PADA RAJAKAPOTASANA
5. Frog                      = MANDUKASANA
6. Seated/Reclined Butterfly = SUPTA/BADDHA KONASANA
7. Firelog Pose           = AGNI STAMBHASANA

Props required: maybe a blanket, maybe 2 Blocks.

I will be discussing poses that are Hip Openers who require a deeper understanding of being able to perform Backbends without the risk of injuring yourself, like Camel Pose, Hero, Hanuman, Setu Dhanurasana, Urdva Mukha Svanasana...in the next Basics Series.

I will be starting with the first one in my next post, which is easy yet intense: Low Lunge.

See ya! J

YOGA BASICS: Die 7 wichtigsten Hüftöffner!

Ach Du liebe Hüfte!

Ab morgen stelle ich aus meiner neuen Reihe KICK ASS YOGA BASICS jeden Tag einen der 7 wichtigsten Hüftöffner vor, mit Anfänger Varianten und Fortgeschrittenen Optionen. 

Da ich persönlich nicht an Levels glaube, im Sinne von 'Ich praktiziere schon jahrelang und bin deshalb Level 4', sondern eher an Berufsbedingte Stärken bzw. Schwächen, die in Kraft- oder Flexibiltätsübungen zum Ausdruck kommen. 

Als Beispiel: Nehmen wir einen Mann, mittleren Alters, der täglich über Stunden im Sitzen arbeitet und ab und zu Mal Sport treibt, im Vergleich zu einer ehemaligen Tänzerin, die als Choreografin tätig ist. Er wird vielleicht mehr Kraft im Oberkörper anwenden können, während Sie allgemein sehr fexibel ist. Er ist möglicherweise vom Grundprinzip her "überspannt", (im Englischen: tensed) und sie möglicherweise "unterspannt". Beide beginnen ihren Yogaweg und weisen unterschiedliche Voraussetzungen vor: er kann Liegestütze ohne Ende (das wäre in Level 3 Klassen von Vorteil), leidet dafür in Hüftöffnern- ist also in diesem Bereich ein Anfänger, also Level 1. Sie kann kaum ein Chaturanga halten (Level 1) und spürt im Spagat annähernd nichts, ist also hier ein Level 3. 

Das bedeutet, dass wir alle in unseren Körpersystemen unterschiedliche Level finden werden. Es wäre ja auch sonst zu einfach. :)

Diese folgenden 7 Hüftöffner stelle ich vor und teile sie, statt in Level in leicht, mittel oder schwer auf. Für manche dieser Hüftöffner bietet sich als Hilfsmittel eine Decke an oder 2 Klötze. Es ist ausserdem wichtig herauszufinden, und das kann jeder wirklich nur für sich: wo endet die Komfortzone, das Streichelprogramm? und wo fängt das geduldige, saftige Weichkneten an, welches nicht immer angenehm ist aber niemals schmerzen darf!:

1. Low Lunge         = Tiefer Ausfallschritt
2. Crescent Lunge = Ausfallschritt (Grundposition des so genannten einfachen Krieger 1)
3. Happy Baby       = ANANDA BALASANA
4. Halbe Taube      = EKA PADA RAJAKAPOTASANA 
5. Frosch               = MANDUKASANA
6. Sitzender Schmetterling/liegender = SUPTA/BADDHA KONASANA
7. Doppelte Taube = AGNI STAMBHASANA


Zur Reihe der Hüftöffner, die jedoch ein tiefergehendes Verständnis der Rückbeugen Thematik voraussetzen, werde ich ein ander Mal vorstellen, wie zB:
Kamel, Hero Pose, Hanumanasana ,Urdva Mukha Svanasana, Setu Dhanurasana.

Ab Morgen kommt als Erstes also der Low Lunge dran, simpel und doch intensiv und jeden Tag anders!
J

Sonntag, 8. März 2015

Multi-Kulti: GERMAN + ENGLISH BLOGPOSTS

Dear Yogis and Yoginis,

My first idea - when I started this Blog - was to write in various languages. I grew up in a trilingual household which has led to my love for words, languages, accents and wordplays. German really is a tough language (every one knows that) if you didn't grow up learning it as a child, which is why I always thought of writing in English as well. I was really happy when I found the Translate Button, which I added to this page, unfortunately, it does work, but...well, no offense...sometimes it doesn't sound quite right - if you know what I mean.


This is why I've decided to start translating some of the recent posts myself, and I am going to write my future posts in various languages as well... I can offer you the obvious German and English but also Croatian and Slovenian (and also bad French and Spanish ;).

So, whenever you're checking my Blog, look for the labels if you're specifically looking for posts in different languages...

Namaste,
J